New planting design
- Rhidian Maltby
- Feb 26, 2025
- 2 min read

These beds were looking a bit tired and lacked structure, they had been in place for a few years and the client wanted to freshen them up. The first job was to remove the existing plants.


Once the plants were removed, we made sure the beds were clear of unwanted weeds and bedris like rocks, bricks etc. We then raked the soil to break down and large clumps of soil and create a nice surface to plants the new plants in to.


Soil after removing plants Soil after making good for planting
The next step was to refer to the planting plan and start to mark out the beds using string and small flag markers.


String and flags in place Taxus baccata placed


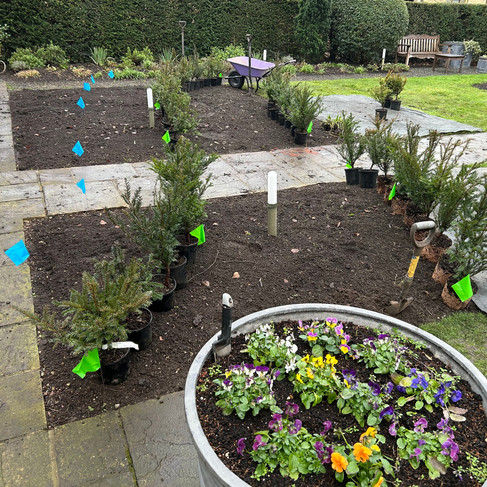
All plants in the correct position
Once the plants were all placed in to position, we removed the string and flags and i removed the plants from their pots, ready to be dug in.


Root balls of the Taxus baccata
We then used an electric Auger to speed up the planting process and it also tends to make things tidier as there isn't the fill to place that there would be if using a spade.


Drilling holes with Auger for efficient planting process
Once all the plants were in the ground, we tidied away all the pots and made good the soil surface once again.
The next job was to give the beds a nice new edging, i did this again using a string line and half moon edging spade, and hoe and edging sheers.
Creating a nice edge for the new planting beds
After completing the edges, we then spent time to clean up the site, we had to use a hose and broom to clean up the path which had become very muddy during the course of the day.


The new planting design complete and ready to start growing once the warm spring weather
comes along.


Comments